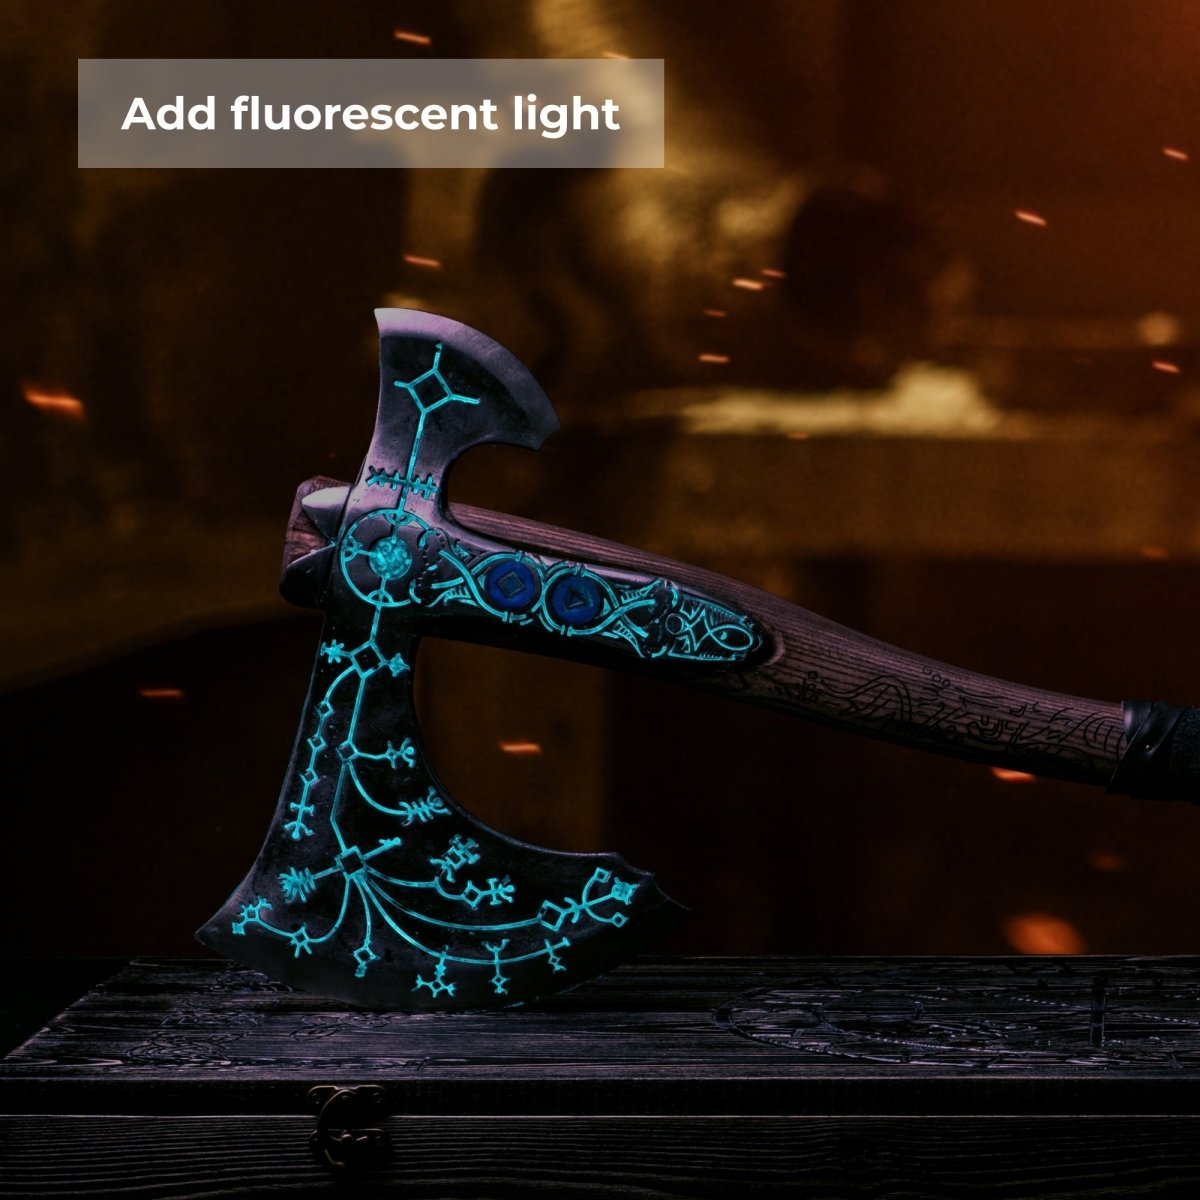
Ladeanleitung für leuchtende Runen auf Ihrer Axt oder Ihrem Hammer
Fluoreszierende Runen auf Ihrer Axt können effektiv mit Licht aufgeladen werden. Befolgen Sie einfach diese einfachen Schritte, um eine optimale Aufladung zu gewährleisten:
Wählen Sie einen gut beleuchteten Bereich
Platzieren Sie Ihre Axt mit fluoreszierenden Runen in einem Bereich mit ausreichend natürlichem oder künstlichem Licht. Die Runen absorbieren Energie aus Lichtquellen, daher ist eine gut beleuchtete Umgebung unerlässlich.

Direkte Lichteinwirkung
Positionieren Sie die Axt so, dass die fluoreszierenden Runen direktem Licht ausgesetzt sind. Stellen Sie sicher, dass die Runen nicht durch Gegenstände verdeckt werden, damit sie das Licht effektiv absorbieren können.

Dauer der Exposition
Für eine optimale Aufladung lassen Sie die fluoreszierenden Runen mindestens 2-4 Stunden lang Licht absorbieren. Eine längere Exposition kann zu einem nachhaltigeren Leuchten führen. Natürliches Sonnenlicht oder helles Kunstlicht funktioniert am besten.
Produkt drehen
Drehen Sie die Axt oder den Hammer regelmäßig, um sicherzustellen, dass alle Seiten der fluoreszierenden Runen gleichmäßig dem Licht ausgesetzt sind. Dies hilft, ein gleichmäßiges und konsistentes Leuchten über die Runen hinweg zu erzielen.
Extreme Hitze vermeiden!
Vermeiden Sie während des Ladevorgangs, die Axt extremen Wärmequellen auszusetzen, da dies sowohl die Runen als auch das Produkt beschädigen könnte. Raumtemperatur ist ideal für den Ladevorgang.
Leuchten testen
Begeben Sie sich nach dem Aufladen in eine dunklere Umgebung und beobachten Sie das Leuchten der fluoreszierenden Runen. Wenn das Leuchten nicht wie erwartet ist, bringen Sie die Axt zum zusätzlichen Aufladen in einen gut beleuchteten Bereich zurück.
Bei Bedarf wiederholen
Wenn das Leuchten mit der Zeit nachlässt, wiederholen Sie den Ladevorgang. Regelmäßige Lichteinwirkung sorgt für ein nachhaltiges und lebendiges Leuchten der fluoreszierenden Runen.
Denken Sie daran, dass das richtige Aufladen das ästhetische Erscheinungsbild und die Funktionalität der fluoreszierenden Runen auf Ihrer Axt verbessert. Genießen Sie das faszinierende Leuchten bei schlechten Lichtverhältnissen!